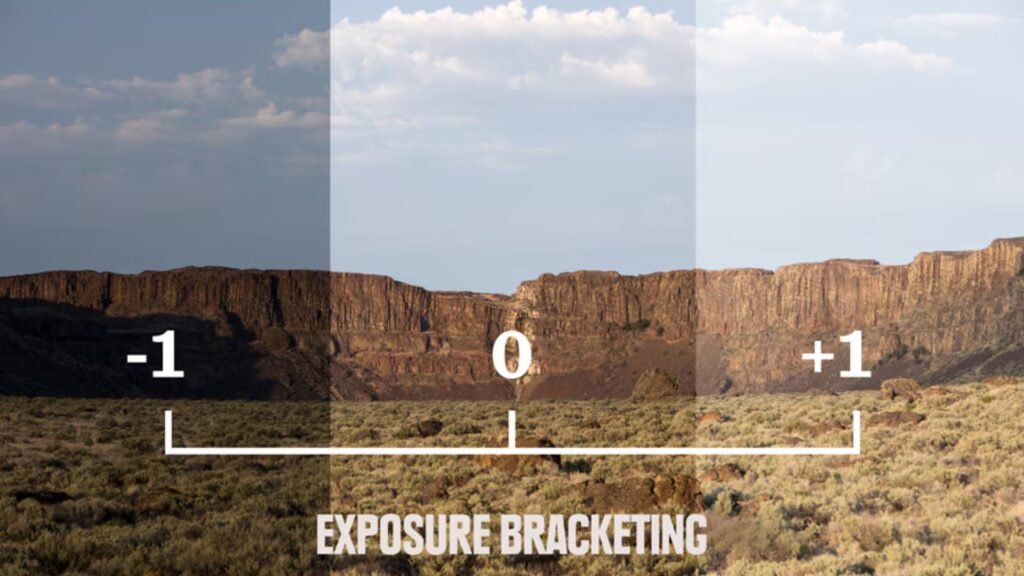
Exposure is one of the most crucial elements in photography, determining how light or dark your image will appear. Understanding how to control exposure is essential for capturing photos with the right brightness, contrast, and detail. This guide breaks down the basics of exposure and how to manipulate it for optimal results.

The Exposure Triangle
Aperture
- Definition: Aperture refers to the opening in the lens through which light passes. It is measured in f-stops (e.g., f/2.8, f/5.6).
- Impact on Exposure: A larger aperture (smaller f-number) allows more light to enter the camera, resulting in a brighter image. Conversely, a smaller aperture (larger f-number) lets in less light, making the image darker.
- Depth of Field: Aperture also affects the depth of field, which is the range of sharpness in an image. A wide aperture creates a shallow depth of field (blurry background), while a narrow aperture increases the depth of field (more of the image in focus).
Shutter Speed
- Definition: Shutter speed is the amount of time the camera’s shutter remains open to let light in. It is measured in seconds or fractions of a second (e.g., 1/500s, 1s).
- Impact on Exposure: A fast shutter speed (e.g., 1/1000s) allows less light to hit the sensor, resulting in a darker image. A slow shutter speed (e.g., 1/30s) lets in more light, making the image brighter.
- Motion Blur: Shutter speed also affects motion blur. Fast shutter speeds freeze motion, while slow shutter speeds capture motion blur, which can be used creatively.
ISO
- Definition: ISO measures the sensitivity of your camera’s sensor to light. It is typically represented in numbers like 100, 400, 800, and so on.
- Impact on Exposure: A low ISO (e.g., 100) is less sensitive to light, producing clearer images with less noise. A high ISO (e.g., 3200) is more sensitive, allowing for better performance in low-light conditions but increasing noise or graininess.
- Balancing ISO: Adjust ISO to maintain a proper exposure while minimizing noise. Use the lowest ISO setting possible to achieve the best image quality.
Balancing the Exposure Triangle
Achieving Proper Exposure
- Exposure Meter: Most cameras have an exposure meter or histogram that helps you assess exposure. The goal is to balance aperture, shutter speed, and ISO to achieve a well-exposed image according to your creative intent.
- Exposure Compensation: Use exposure compensation to adjust the exposure based on the camera’s metering. This is useful for correcting images that are too bright or too dark.
Creative Effects
- Depth of Field: Use aperture to control the depth of field, enhancing the focus on your subject or creating a beautiful background blur.
- Motion Effects: Adjust shutter speed to capture motion blur for dynamic effects or freeze fast-moving subjects for sharp details.
Practical Tips
Use Manual Mode
- Experiment: Switch to manual mode to gain full control over aperture, shutter speed, and ISO. Experiment with different settings to see how they affect exposure and image quality.
- Practice: Take multiple shots at varying settings to understand how changes impact exposure and learn how to balance the triangle for different shooting conditions.
Utilize Presets and Modes
- Aperture Priority Mode: Set the aperture and let the camera adjust the shutter speed. This is useful for controlling depth of field while letting the camera handle exposure.
- Shutter Priority Mode: Choose the shutter speed and let the camera adjust the aperture. This is ideal for capturing fast action or avoiding motion blur.
Conclusion
Understanding exposure is fundamental to mastering photography. By learning how to control aperture, shutter speed, and ISO, you can create images with the right brightness, contrast, and detail. Practice balancing these elements to achieve proper exposure and explore creative possibilities. With time and experience, you’ll gain confidence in making exposure adjustments to suit your photographic vision.


