Starting out in photography can be both exciting and overwhelming. With so many techniques and settings to explore, it’s easy to feel lost. However, by mastering a few key photography techniques, you can significantly improve your skills and begin capturing beautiful images right away. Whether you’re using a DSLR, mirrorless camera, or even a smartphone, these beginner-friendly techniques will set you on the right path.
1. Mastering Composition
Composition refers to the arrangement of elements within a photograph. A well-composed image can be visually appealing and convey your intended message effectively. Here are some basic composition techniques to get you started:
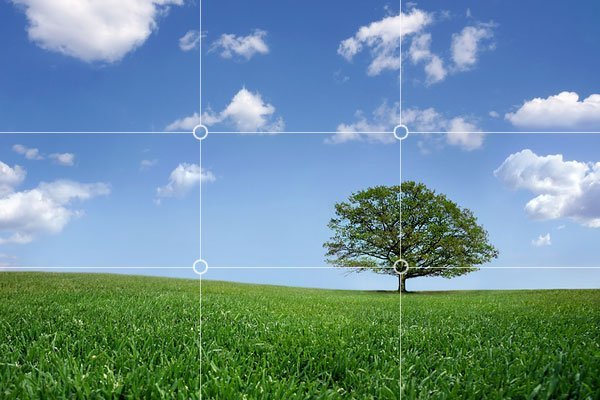
- Rule of Thirds: Imagine your image is divided into nine equal parts by two horizontal and two vertical lines. Position the main subject or focal point along these lines or at their intersections to create a balanced and engaging composition. Most cameras have a grid overlay that you can turn on to help with this.
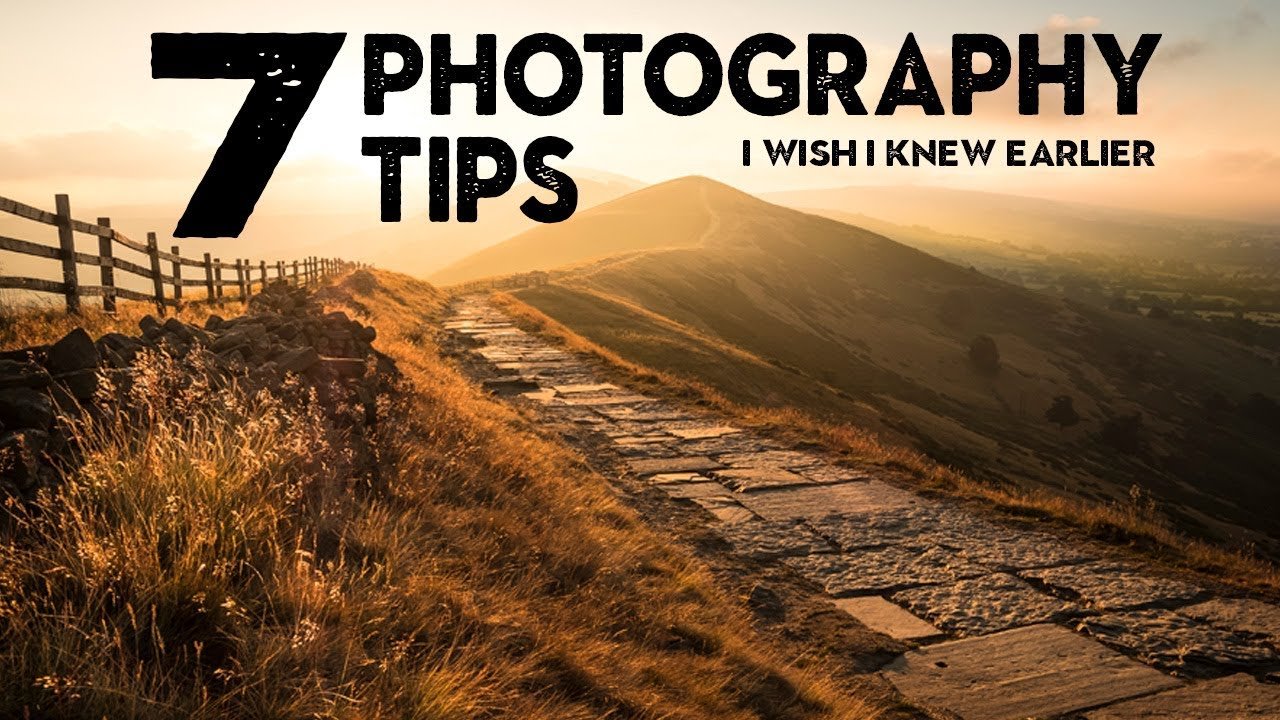
- Leading Lines: Use natural lines in your environment, such as roads, rivers, or pathways, to lead the viewer’s eye towards the main subject of your photo. Leading lines can add depth and guide the viewer through the image.
- Framing: Use elements within the scene, such as windows, doorways, or arches, to frame your subject. Framing draws attention to the subject and adds context to the photograph.
- Symmetry and Patterns: Symmetry and patterns can create a sense of harmony and balance in your photos. Look for symmetrical scenes or repeating patterns, such as reflections or architectural details, to create visually striking images.
- Fill the Frame: Get closer to your subject to eliminate unnecessary background elements and fill the frame with the subject. This technique is particularly effective for portraits and close-up shots, as it highlights details and creates a more intimate connection with the viewer.
2. Understanding Lighting

Lighting is one of the most important aspects of photography. The quality and direction of light can dramatically affect the mood and clarity of your images. Here’s how to make the most of available light:
- Natural Light: Natural light is often the most flattering and easiest to work with, especially for beginners. The best times to shoot are during the “golden hours” shortly after sunrise and before sunset, when the light is soft, warm, and diffused.
- Avoiding Harsh Shadows: Midday sunlight can create harsh shadows and overly bright highlights. If you have to shoot in harsh light, try to find some shade or use a diffuser to soften the light.
- Using Reflectors: Reflectors can be used to bounce light back onto your subject, filling in shadows and creating a more balanced exposure. Reflectors are especially useful for portrait photography, where even lighting on the subject’s face is important.
- Experimenting with Directional Light: Play with different light directions to create various effects. Front lighting evenly illuminates the subject, side lighting adds depth and texture, and backlighting can create dramatic silhouettes.
- Artificial Lighting: If you’re shooting indoors or in low light, artificial lighting, such as lamps or studio lights, can help. Experiment with different types of lighting and modifiers, like softboxes or umbrellas, to achieve the desired effect.
3. Learning Basic Camera Settings
Understanding your camera’s basic settings will allow you to take control of your photography rather than relying on automatic modes. Here are the key settings to focus on:
- Aperture (f-stop): Aperture controls the amount of light entering the camera and affects the depth of field. A larger aperture (lower f-stop number) allows more light in and creates a shallow depth of field, perfect for portraits. A smaller aperture (higher f-stop number) allows less light in and increases the depth of field, making it ideal for landscapes.
- Shutter Speed: Shutter speed determines how long the camera’s shutter remains open, controlling the exposure time. A fast shutter speed (e.g., 1/1000) freezes motion, while a slow shutter speed (e.g., 1/30) can create motion blur, useful for capturing movement, like flowing water.
- ISO: ISO measures the camera sensor’s sensitivity to light. A lower ISO (e.g., 100) is best for bright conditions, while a higher ISO (e.g., 800 or above) is useful in low-light situations. However, increasing ISO can introduce noise, so it’s best to use the lowest ISO possible for a clean image.
- Exposure Compensation: Exposure compensation allows you to adjust the exposure set by the camera’s automatic mode. If your photos are too dark or too bright, you can use exposure compensation to fine-tune the exposure without switching to manual mode.
- White Balance: White balance adjusts the color temperature of your photos to match the lighting conditions. Most cameras have presets like Daylight, Cloudy, and Tungsten, which help ensure accurate colors. Understanding and adjusting white balance can prevent your images from looking too warm (yellow/orange) or too cool (blue).
4. Focusing Techniques
Getting your subject in sharp focus is essential for a great photograph. Here are some tips to ensure your images are crisp and clear:
- Single-Point Focus: For precise focusing, especially in portraits, use single-point focus mode and manually select the focus point. Place the focus point on your subject’s eyes or the most important part of the scene.
- Continuous Focus: For moving subjects, switch to continuous focus mode (AI-Servo on Canon, AF-C on Nikon). This mode continuously adjusts the focus as the subject moves, helping you keep the subject sharp.
- Focus and Recompose: When using a single focus point, you can focus on your subject, hold down the shutter button halfway, and then recompose your shot before fully pressing the shutter. This technique is useful for off-center compositions.
- Depth of Field Preview: Many cameras have a depth of field preview button, allowing you to see how much of the scene will be in focus. This is especially helpful when using a small aperture for landscape shots.
5. Practicing Patience and Experimentation
Photography is a skill that improves with practice. Don’t be afraid to experiment with different techniques, settings, and perspectives. Take your time to study your subject, try multiple compositions, and learn from each shot you take. Review your photos regularly to identify what works and what doesn’t, and use this feedback to improve your future shoots.
6. Editing Your Photos
Post-processing is an essential part of modern photography. Editing your photos allows you to enhance colors, correct exposure, and apply creative effects. Start with basic editing tools like cropping, adjusting brightness/contrast, and color correction. As you become more comfortable, you can explore advanced techniques like dodging and burning, sharpening, and working with layers.
Conclusion
Learning the best photography techniques as a beginner sets the foundation for your journey as a photographer. By mastering composition, understanding lighting, learning basic camera settings, and practicing your focusing skills, you’ll quickly see improvements in your work. Remember, photography is an art form that requires patience and experimentation, so don’t be afraid to try new things and learn from your experiences. With these techniques, you’ll be well on your way to capturing stunning images that tell your unique story.


