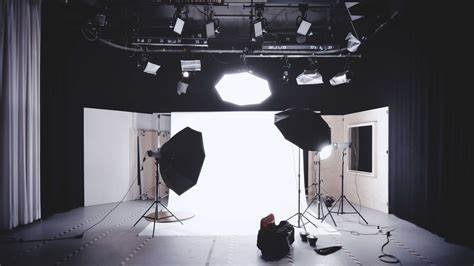
Lighting plays a crucial role in videography. It can make or break the quality of your video. Proper lighting helps you create the mood, highlight important details, and ensure clear footage. Here’s how to use lighting effectively in various situations.
1. Natural Lighting for Outdoor Shots
Natural lighting offers a beautiful, soft quality that works well for outdoor videography. During the golden hour, which occurs shortly after sunrise and before sunset, the light is warm and flattering. Position your subject with the light facing them for the best results. Additionally, avoid harsh midday sun, which can create unflattering shadows. Instead, shoot in shaded areas to achieve a softer, more even light.
2. Soft Lighting for Interviews
For interviews, soft lighting helps create a flattering look for your subject. Use diffusers to soften the light and minimize harsh shadows. Place the light source slightly to the side of the camera for a natural look. A popular setup is the three-point lighting technique, which includes a key light, fill light, and backlight. This setup provides depth and dimension, making your subject look more three-dimensional.
3. Dramatic Lighting for Creative Scenes
Dramatic lighting can add a powerful effect to creative scenes. Use strong, directional lights to create bold shadows and highlights. For instance, a spotlight can emphasize a subject against a dark background. Experiment with angles and intensities to find the perfect balance. Additionally, color gels can add mood and atmosphere by changing the color of the light.
4. Low-Light Situations
In low-light situations, such as night shoots or dimly lit rooms, you need to adjust your approach. Use a fast lens with a wide aperture to capture more light. Additionally, increase your camera’s ISO setting, but be cautious of introducing noise. Use additional light sources, such as portable LED lights, to brighten the scene. Position these lights close to your subject for a clearer image.
5. Backlighting for Silhouettes
Backlighting can create striking silhouettes and add drama to your video. Position the light source behind your subject to achieve this effect. Ensure that the light is strong enough to outline your subject clearly. Adjust the camera settings to expose for the background light, which will darken your subject and create a silhouette. This technique works well for emphasizing shapes and creating a dramatic look.
6. Indoor Lighting for Home Settings
When filming indoors, use a combination of ambient and artificial lights. Floor lamps, table lamps, and ceiling lights can create a warm, inviting atmosphere. Position lights strategically to eliminate unwanted shadows. Additionally, use bounce cards to reflect light onto your subject and fill in any shadows. Adjust the color temperature of your lights to match the natural light coming through windows for a cohesive look.
7. Using Reflectors and Diffusers
Reflectors and diffusers are essential tools for controlling lighting. Reflectors bounce light back onto your subject, which can fill in shadows and brighten the scene. Use white, silver, or gold reflectors depending on the desired effect. Diffusers, on the other hand, soften harsh light and reduce shadows. Place them between the light source and your subject for a more even illumination.
8. Practical Lighting for Everyday Scenes
Practical lighting, such as lamps and streetlights, can enhance everyday scenes by adding realism. Incorporate these light sources into your shot to create a natural look. Ensure that these lights match the overall color temperature of your scene. Additionally, position the practical lights so they don’t overpower the scene but complement the existing lighting setup.
Lighting is a vital aspect of videography that greatly influences the final result. By understanding and applying these lighting techniques, you can enhance your videos and create professional-quality content. Experiment with different setups to find what works best for each situation, and always consider how lighting affects the mood and clarity of your footage.


